
Support
Traxlock Rail wall installation.
Always use a level. Fix into studs whenever possible. Use the right fasteners for your wall type, and never exceed the rated load capacity.
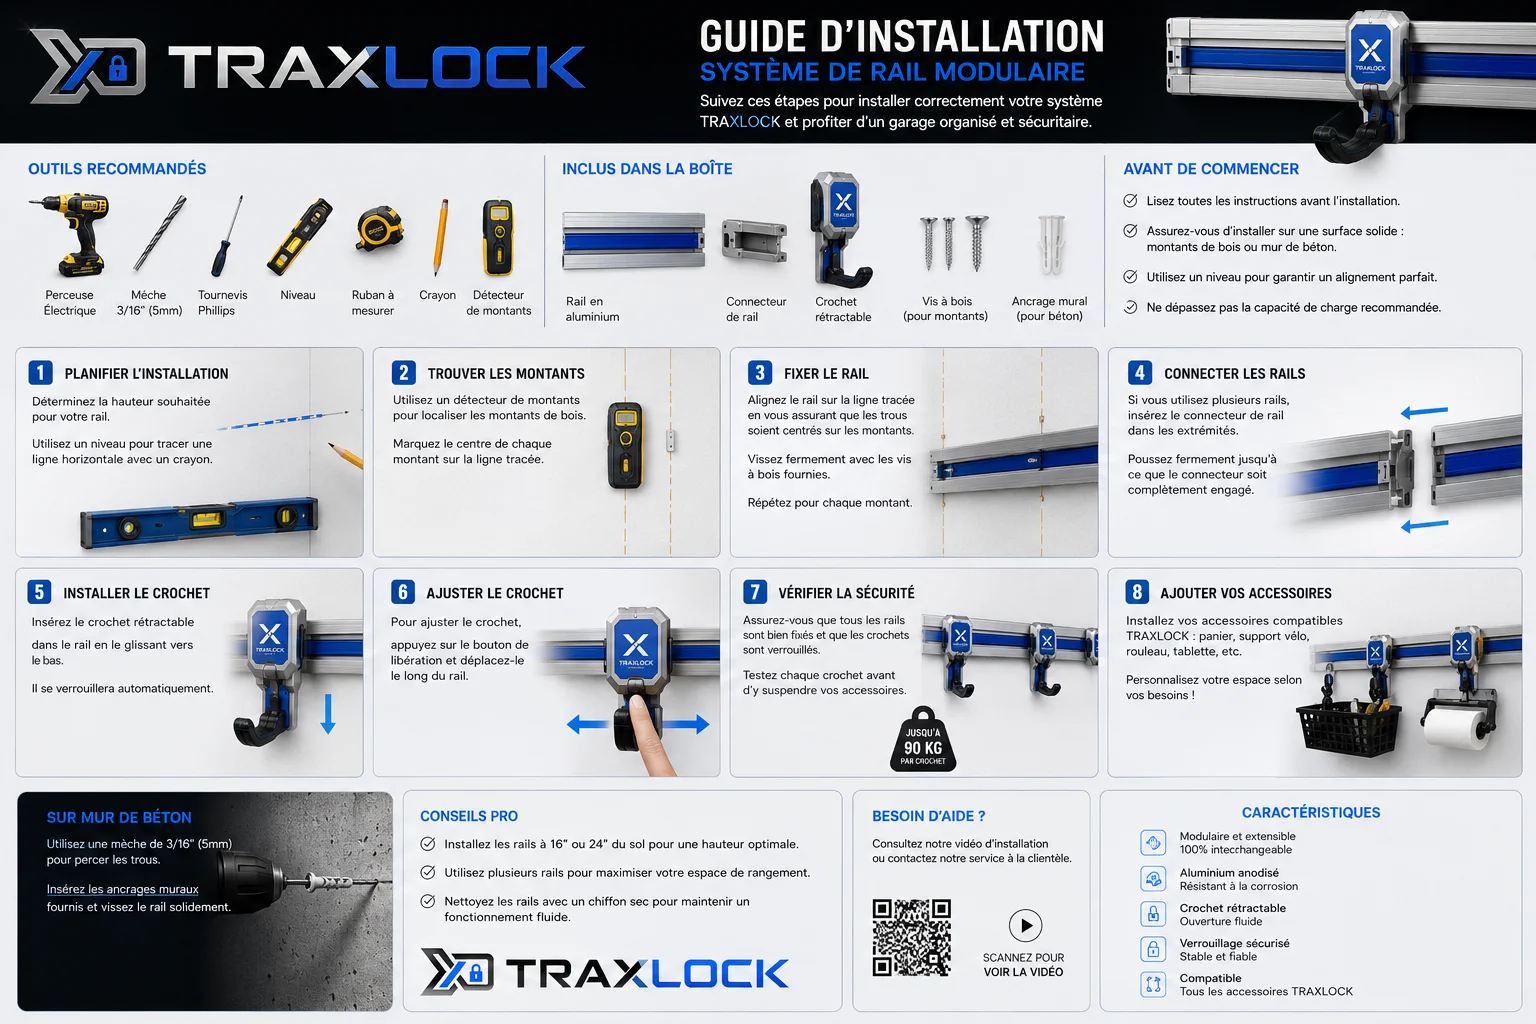
What you need
- Level
- Drill
- Pencil
- Tape measure
- Safety glasses
Hardware included
- 1/4" x 2-1/2" hex screws
- Drywall anchor
- Washer
- Finishing end cap
Step by Step
Installation in 8 steps.
Choose the Location
Pick a flat, sturdy spot. Make sure you have enough room for your accessories and storage.
Mark the Line
Use a level to draw a horizontal line at the desired position.
Find the Studs
Use a stud finder and mark the stud centers on the line (ideally 16" on center).
Pre-Drill
Drill pilot holes at the marked locations.
Mount the Track
Align the holes in the Traxlock Rail with the pilot holes. Insert and tighten the screws.
Check the Level
Verify the track is straight. Adjust before fully tightening.
Add End Caps
Insert finishing caps at the track ends for a clean, professional look.
Installation Complete
Your Traxlock Rail is securely mounted and ready for accessories.
Fixation Detail
For every type of wall.
Use the recommended fastener for your wall type. Screws are spaced a maximum of 16" apart, with 3" from each end of the track.
Wood / Stud
Use the included screws directly into the stud.
1/4" x 2-1/2" hex screw
Concrete
Use a 1/4" masonry bit and insert a concrete anchor (not included).
Concrete anchor
Brick
Use a 1/4" masonry bit and insert a concrete anchor (not included).
Concrete anchor
Drywall
Drill a 1/2" hole and insert the included drywall anchor.
Drywall anchor (included)
Recommended screw spacing
Max 16" (406mm) between screws, with 3" (76mm) from each end of the track.
Load capacity
66 lbs+ per 24" of track, when installed correctly into studs.
FAQ
Frequently asked questions.
Warranty
Traxlock rails and X-Core accessories are covered by a limited warranty against manufacturing defects for as long as you own them, when installed and loaded within the rated specifications.
Contact Support
Have a question about your installation or a missing part? Reach our support team and we'll help you get your wall built right.